Introduction
watsonx Orchestrate supports two types of agents: native agents and external agents.- External agents are services hosted by partners or customers outside of WXO. They expose an API that watsonx Orchestrate can call when needed.
- Native agents are built and deployed directly within Orchestrate. They use IBM-managed models, tools, and runtime.
Steps to onboard an agent
1
Install the watsonx Orchestrate Agent Development Kit
Follow the instructions in the Getting started with the ADK to install the Agent Development Kit and to connect it to your current watsonx Orchestrate environment.
2
Create an agent
External agent
External agent
- Build a service that exposes a
/chat/completionsendpoint. See an example of the watsonx Orchestrate chat completions API here . - Accepts conversation history, always expects
”stream”: Truein the payload, and returns streams of SSE events. - Secure the endpoint with API key or bearer token. The
api-keyheader will always bex-api-key. - See examples: External Agent GitHub Samples .
Native agent
Native agent
By following the Getting started with the ADK tutorial, you are building a native agent.To learn more about native agent capabilities, see Authoring agents .
3
Define an agent configuration file (external agent only)
Use this JSON specification as your configuration file. It declares the external agent, defines the metadata and authentication details.
partner_research_agent.json
4
Import agent into Orchestrate (valid for both native and external agents)
Run the For more information about importing agents, see Importing/Deploying agents .
orchestrate import command to bring your agent into your draft environment:5
Build tools for your native agent (for native agents only)
Native agents can call tools to perform tasks. You can define tools as Python or YAML (OpenAPI) files, such as the following one:To learn more about tools, see Overview of Tools .
6
Create native agent and add collaborator (for external agents only)
External agents can’t be chatted with directly — they must be attached to a native agent as collaborators.Partners can create a native agent using the ADK CLI:This command scaffolds a native agent definition file named Finally, import the native agent into your environment with ADK:For more informations about external agents and how to connect them with native agents, see Connect to external agents .
my_native_agent.yaml.You can then edit this file to add more collaborators or tools as needed.my_native_agent.yaml
7
Open a chat with your native agent
-
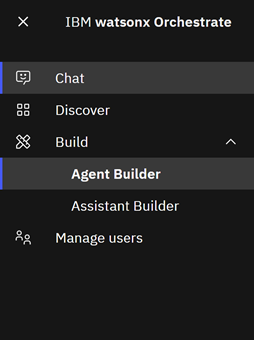
Log in to your watsonx Orchestrate instance and open the Agent Builder:

-
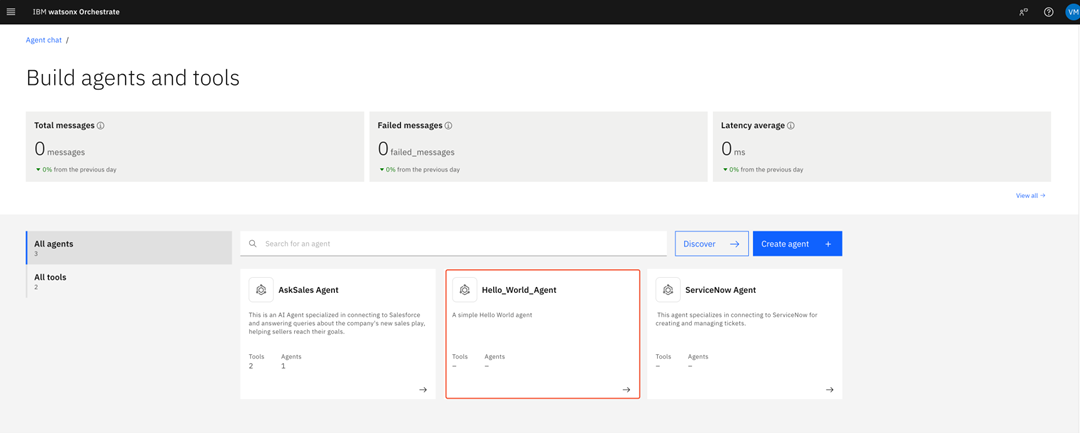
In the Build agents and tools page, select your agent.

-
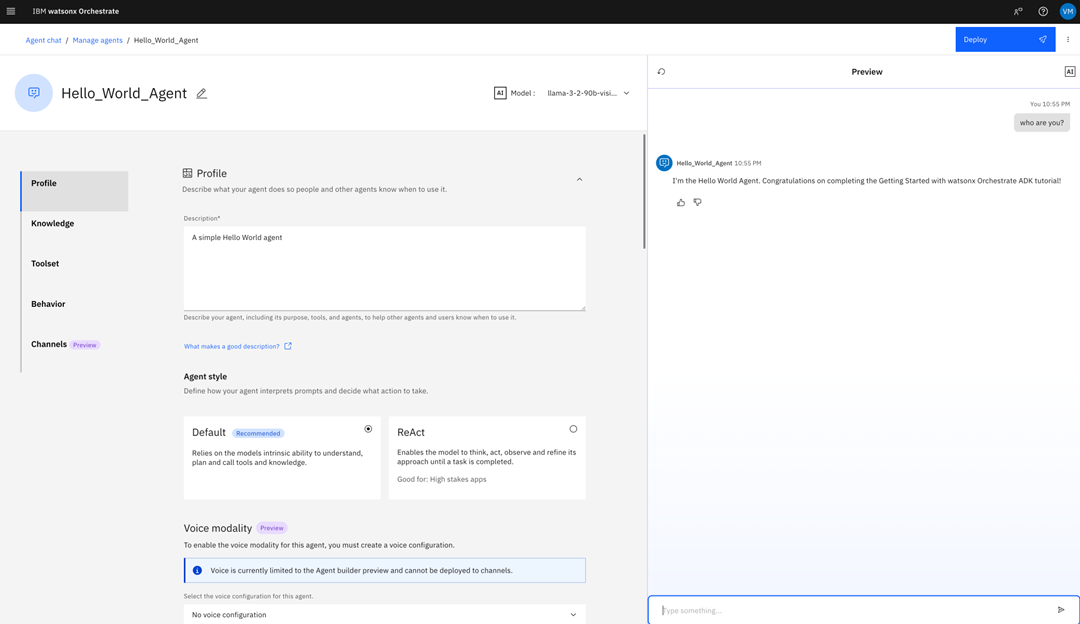
In this page, you can customize your agent’s behavior. Use the test chat to test your agent and see if it calls your external agent (if available).

Note:
To install watsonx Orchestrate Developer Edition, you need a valid license. You can obtain a license by:
- Purchasing a license for watsonx Orchestrate SaaS (on AWS or IBM Cloud)
- Contacting the IBM sales department to purchase the Developer Edition exclusively
8
Validate with the ADK
Create a TSV test file with prompts and expected outputs.Run validation with ADK:For more information, see Validating your agent.
9
Scaffold your offering folder
Run the ADK command to create a packaging workspace for your offering:This command:
-
Creates a new folder named after your offering (e.g.,
my_offering/). - Prepopulates a standard directory layout that the packager understands.
- Seeds placeholder files you’ll edit or replace (especially the agent definition).
-
Binds metadata from flags (
--offering,--publisher,--type,--agent-name) into the generated files so packaging can validate the bundle.
-
agents/: Replace or confirm the generated file with your agent config JSON (the one you authored earlier). This is where you ensure required metadata like publisher, tags, language_support, icon, and category: “agent” are present before packaging. -
connections/(optional): If your agent references credentials or endpoints via “connections,” define them here so packaging can validate consistency. -
offerings/: The packager reads this to understand your offering’s identity and type (external vs native). You rarely hand-edit this unless you’re changing the display metadata/version. -
tools/(optional): If your offering ships tools (e.g., helper endpoints), place their definitions here. -
evaluations/: Add the evaluation outputs from Step 8 so the final ZIP contains both the agent and its validation evidence.
my_offering-1.0.zip. For more information, see the Packaging your offering.10
Place validation results
After running your evaluations with the ADK (Step 8), you’ll get an evaluation results archive — a single ZIP file that contains:
test.tsv→ your original prompt/expected-output file.validation_results.json→ detailed pass/fail logs at the test case level.summary_metrics.csv→ aggregate metrics (accuracy, precision, recall, etc.).
evaluations/ folder created in Step 9.11
Package your offering (final deliverable)
Now that your scaffold is complete (agents, connections, offering metadata, tools, evaluations), you’re ready to package everything into a single distributable zip.Before running this step, double-check whether your agent configuration file (JSON or YAML) has these required fields:If these fields are missing or blank, the package command will fail and your agent won’t pass onboarding review.Run the ADK packaging command:This command:
- Validates folder structure — checks that required files are present (at least one agent, offering metadata, evaluations).
- Bundles artifacts — zips up the folder into a portable archive.
-
Outputs a versioned package (e.g.,
my_offering-1.0.zip) which contains:agents/(your agent JSON definitions, with publisher, tags, icon, etc. filled in)offerings/(top-level metadata about the bundle)connections/(if defined)tools/(if defined)evaluations/(your validation results)
12
Submit your complete bundle (onboarding via the IBM Partner Center application)
Once you have your packaged archive (
my_offering-1.0.zip), you’re ready to submit it for onboarding.- Log in to the IBM watsonx Orchestrate IBM Partner Center.
- Go to the My AI products → Agent page.
- Select the type of agent that applies to your case.
- Under Add agent package, select your agent package, and upload it to the application.
- Click Publish to submit your package.
What IBM checks during onboarding
When you submit your bundle, the IBM Partner Center and IBM onboarding team validate:- Offering metadata: publisher, tags, category, and icon are properly set.
- Agent definition: API details, authentication scheme, and structure are correct.
- Evaluation artifacts: validation results and metrics are included in
evaluations/and show that the agent is functional. - Folder structure: matches the required scaffold (agents, offerings, evaluations, etc.).
What happens after approval
- Catalog publishing: Once your submission is reviewed and approved, your agent enters the publishing queue for the Watsonx Orchestrate Catalog.
- Discovery & provisioning: End-users will then be able to find your agent in the catalog, provision it into their own environment, and use it directly in Orchestrate flows.
- Ongoing updates: To ship new features or fixes, simply increment the version number in your agent definition, re-run the packaging process, and resubmit through the IBM Partner Center. The same validation and approval process applies.

